
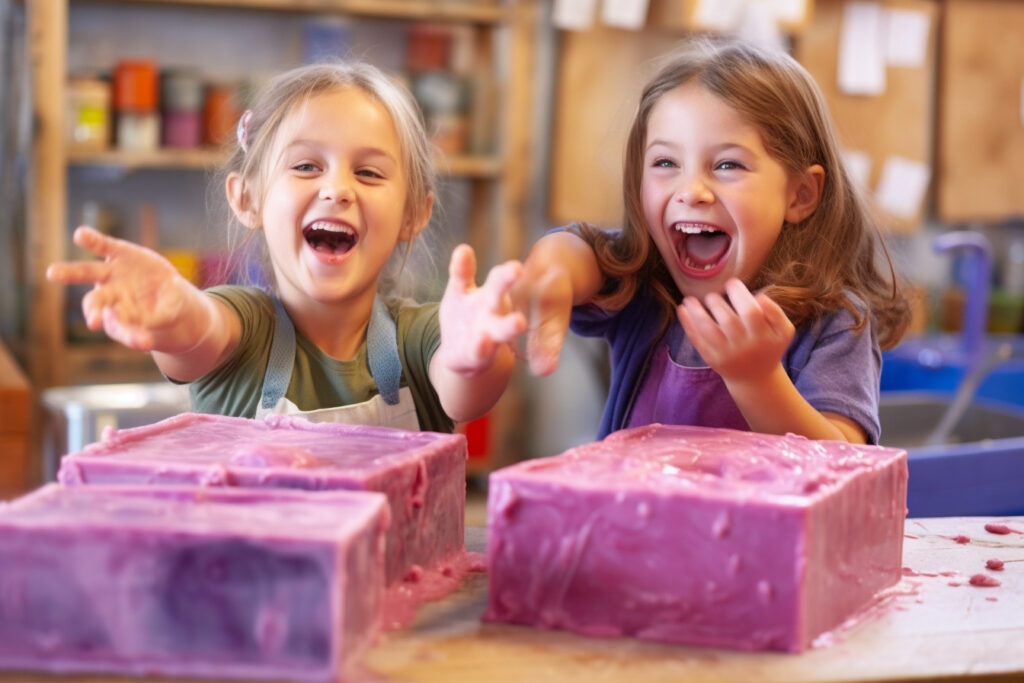
Are you looking for a fun activity to do with your kids that is both creative and practical? Why not try making your own soap?
Not only is it a great way to spend quality time together, but it also teaches valuable skills such as following instructions, measuring ingredients, and understanding chemical reactions.
Making soap may seem daunting at first, but with the right guidance and materials, it can be an enjoyable and rewarding experience. Plus, you get to customize your soap with scents and colors of your choice!
In this article, we will guide you through the basics of DIY soap making so that you can create beautiful bars of soap with your little ones. So gather up your supplies and let’s get started!
Understanding the Basics of Soap Making
Get ready to embark on an exciting journey of mixing and pouring as you explore the fundamental principles of crafting your own cleansing bars.
But before we dive into the fun part, let’s talk about soap making safety. Always wear gloves, goggles, and long-sleeved clothing to avoid any contact with lye or other harmful chemicals. Keep in mind that soap making is not a kid-friendly activity unless proper precautions are taken.
[product_blocks id=”1830″]
Now that we’ve covered safety, let’s move on to common mistakes to avoid. One mistake many beginners make is not measuring ingredients accurately. This can lead to soaps that are too oily or too dry and crumbly.
Another mistake is adding fragrance oils at the wrong temperature, which can cause scent fading or discoloration over time. By being mindful of these common pitfalls, you’ll be well on your way to creating beautiful and safe DIY soaps with your kids!
Choosing the Right Ingredients
Choosing the right ingredients is crucial for creating a safe and effective product that both you and your little helpers can enjoy. When selecting ingredients, it’s important to consider whether you want to use natural or synthetic options.
Natural ingredients like essential oils and plant-based colorants are great for those who prefer a more eco-friendly approach, while synthetic options may be preferred by those who want more control over the scent or color of their soap.
Another important factor to keep in mind when choosing ingredients is safety precautions. Certain substances like lye can be harmful if not handled correctly, so make sure to read up on proper usage before incorporating it into your soap making process.
You may also want to consider using gloves and goggles during the mixing process to avoid any potential skin irritation or eye damage. By being mindful of these factors when selecting your soap making ingredients, you can create a fun and safe activity for you and your kids to enjoy together!
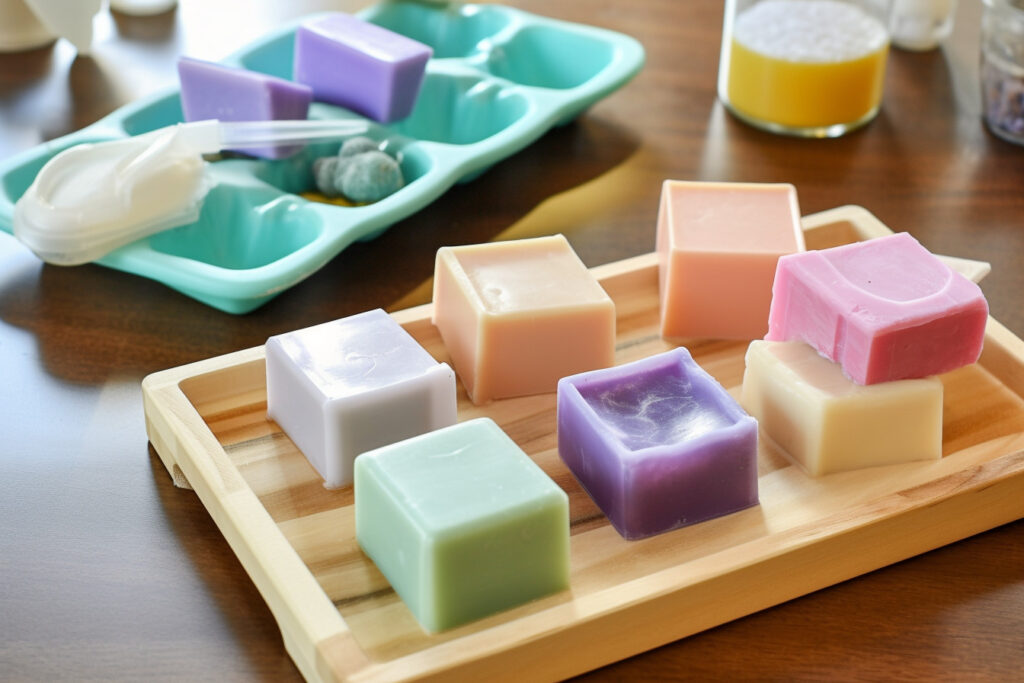
Adding Scents and Colors to Your Soap
Now it’s time to add some personality to your creation with scents and colors that will make you smile. When it comes to adding fragrance to your soap, you have two options: essential oils or fragrance oils.
Essential oils are derived from plants and offer natural scents while fragrance oils are synthetic and offer a wider range of scents. While essential oils may be more expensive, they provide a more natural option for those who prefer plant-based products. On the other hand, fragrance oils can be a good choice if you’re looking for unique scents that aren’t found in nature.
Once you’ve chosen your scent, it’s time to add some color! Natural coloring options include herbs and spices such as turmeric or spirulina powder while synthetic colors offer a wider range of hues. It’s important to note that natural colors may not produce vibrant results compared to their synthetic counterparts.
When it comes down to choosing between natural versus synthetic colors, consider the overall theme of your soap and what kind of effect you want to achieve. Whichever option you choose, adding color is an easy way to make your soap stand out and look visually appealing!
The Chemical Reaction Process
Before your soap can be fully formed and ready to use, it must undergo a chemical reaction process that will transform your ingredients into a solid bar of soap. This process is called saponification, and it occurs when an acid (such as the oils and fats used in soap making) reacts with a base (in this case, sodium hydroxide or lye).
The result of this reaction is soap and glycerin. During the chemical reaction process, the acid and base molecules break apart and recombine in a new way. This creates a new substance – soap – through a series of complex reactions known as saponification kinetics.
It’s important to measure the ingredients carefully to ensure that you have just the right amount of acid and base for the reaction to occur properly. Once you’ve mixed everything together, it will take several hours for the chemical process to complete before your soap is ready to use!
Storing and Using Your Homemade Soap
To ensure your homemade soap is long-lasting and effective, you’ll need to properly store and use it after the saponification process is complete.
There are several storing options to choose from, depending on your preference. You can keep your handmade soap in an airtight container or wrap it in wax paper before placing it in a cool, dry place. This will prevent moisture from getting into the soap and causing it to melt or become soggy.
[product_blocks id=”1830″]
Another option is to make your own soap dish using ceramic or wooden materials that allow for proper drainage. This keeps the bar of soap dry when not in use, which helps prolong its lifespan.
When using your homemade soap, be sure to lather well with warm water before applying it onto your skin. This allows the soap to penetrate deeper into pores and cleanse thoroughly.
Aside from personal usage, these DIY soaps also make great gift ideas! Simply wrap them up with ribbon or place them in decorative boxes for a thoughtful present. Your kids will love making their own unique creations while sharing them with family and friends alike.
With proper storage and usage techniques, these handmade soaps can provide lasting benefits for both you and those around you!
Frequently Asked Questions
Can I use food coloring to color my soap?
Yes, you can use food coloring to color your soap, but it’s important to note that not all food coloring options are created equal. Some may work just fine, but others may contain harsh chemicals that could irritate the skin. If you’re looking for a more natural option, consider using natural dyes like beet juice or turmeric powder. These alternatives not only provide vibrant colors but also have added benefits for the skin.
Another alternative is mica powder, which is a cosmetic-grade shimmering powder that comes in a variety of colors and adds a subtle sparkle to your soap creations. No matter what option you choose, always make sure to test the colorant in a small batch before adding it to your entire soap mixture.
What safety precautions should I take when making homemade soap with my kids?
When it comes to making homemade soap with your kids, safety should always be top of mind. Before you begin the soap making process, make sure you have all necessary safety gear on hand. This includes gloves, protective eyewear, and a long-sleeved shirt to protect your skin from any potential burns or splatters.
When mixing lye and water together, be sure to do so in a well-ventilated area as the fumes can be harmful if inhaled. Additionally, keep any pets or small children out of the work area during the soap making process to prevent accidents.
By taking these precautions, you can ensure that making DIY soap with your kids is both fun and safe!
How long does it take for homemade soap to cure before it can be used?
Waiting for your homemade soap to cure is like watching a butterfly emerge from its cocoon. It takes time, patience, and careful attention.
The curing process can take anywhere from four to six weeks, depending on the recipe and ingredients used. During this time, the soap will undergo a chemical reaction called saponification, transforming oils and lye into a solid bar of soap.
As the soap cures, it will become harder and more durable, making for a longer-lasting product. Once fully cured, the consistency of your homemade soap should be firm but not brittle, with a smooth texture that feels luxurious on your skin.
So sit back and let nature work its magic; your homemade soap will be worth the wait!
Can I add glitter to my soap for added sparkle?
Looking to add some sparkle and shine to your homemade soap? Glitter options and other creative additives are a great way to make your soap stand out.
Whether you’re making soap for yourself or as a gift, adding glitter can give it that extra pop of personality. There are many different types of glitter available, including biodegradable options for those who want to be kinder to the environment.
Keep in mind that not all glitters are safe for use on skin, so be sure to do your research before incorporating any new ingredients into your soap-making process. With a little creativity and experimentation, you can create beautiful and unique soaps that will impress everyone who sees them!
Can I use essential oils instead of fragrance oils in my soap?
Are you tired of using soaps that are filled with chemicals and synthetic fragrances? Well, don’t worry, because essential oils are here to save the day! Using essential oils instead of fragrance oils in your soap can provide a plethora of benefits.
Not only do they add a natural scent to your soap, but they also contain therapeutic properties that can promote relaxation, reduce stress, and even boost immunity. Plus, by using natural ingredients like essential oils in your soap making process, you can feel confident knowing that you’re providing a safer alternative for you and your family’s skin.
So, ditch the synthetic fragrances and give essential oils a try. Your skin (and nose) will thank you!
Conclusion
Congratulations! You’ve just completed your first DIY soap-making project with your kids. Not only did you have fun together, but you also learned a lot about the process of soap making and the importance of choosing the right ingredients.
[product_blocks id=”1830″]
Did you know that many conventional soaps contain harmful chemicals like triclosan and phthalates, according to a study by the Environmental Working Group? By making your own soap at home with natural ingredients, not only are you avoiding these harmful substances, but you’re also reducing waste by using reusable molds and packaging.
Plus, it’s a great way to spend quality time with your kids while learning something new. So go ahead and experiment with different scents and colors in your soap recipes. Keep in mind that safety should always come first when handling lye during the chemical reaction process.
And don’t forget to store your homemade soap properly in a cool, dry place for optimal use. Happy crafting!
About the Author

Jessica Altman
Jessica Altman is a small business owner, master soap maker, and passionate advocate for natural skincare. With over a decade of experience in the industry, Jessica has honed her craft to create some of the most luxurious and effective soaps on the market. Her commitment to using only the highest-quality ingredients and sustainable practices has earned her a loyal following of customers who appreciate her dedication to both their health and the environment.
View author profile